
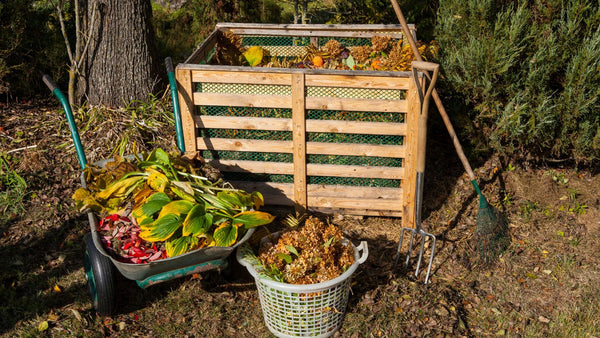
A layered compost bin is simple and effective, perfect for recycling kitchen scraps and yard waste into rich, nutritious compost. Whether you're a seasoned green thumb or a gardening novice, this step-by-step guide will help you set up and maintain a thriving compost bin in your backyard.
Layered composting is a method where organic waste is stacked in alternating layers of carbon-rich materials (“browns" like leaves and sticks) and nitrogen-rich materials ("greens" like food scraps or grass trimmings). A layered compost bin is easy to make and provides the essential elements microbes need to break down organic material effectively.
Food scraps are an essential part of healthy layered compost, but keeping food waste in a countertop bin and frequently emptying a sink strainer can be messy and gross.
But collecting food scraps can be effortless... With Sepura, you can wash all food down your sink and your scraps will be sent into an odor-proof compost bin, only liquids enter your pipes! Check out Sepura (our composting garbage disposal), to make composting convenient.
How to Make a Layered Compost Bin
Creating a layered compost bin is a simple and effective way to recycle kitchen scraps and yard waste into nutrient-rich compost. Here's a step-by-step guide to help even beginners set up their composting system successfully.
Step 1: Choose the Right Location and Bin
Find a spot that is partly shaded to prevent the compost from drying out too quickly but still gets some sun to help heat the compost, which aids decomposition. The location should also be convenient for adding materials and close to a water source for easy moisture management.
You can use a commercially available compost bin or make a compost bin from pallets, wire mesh, or even a simple heap on the ground. Make sure the bin is at least 3 feet wide and deep to provide enough space for composting materials to heat up and break down effectively.
Step 2: Begin with a Rough Base Layer
Start with coarse, bulky materials like twigs, small branches, or straw. These should be loosely piled to a depth of about 6 inches.
This base layer allows air to flow into the bottom of the compost pile, which is crucial for aerobic decomposition. It also helps with drainage, preventing the materials above from becoming waterlogged.
Step 3: Add a Layer of Brown Materials
Add a layer of brown materials, such as dry leaves, shredded newspaper, cardboard, or wood chips. This layer should be about 3-4 inches thick.
Brown materials are rich in carbon, which feeds the microbes in the compost. They also help absorb excess moisture from the green materials, maintaining a good moisture balance.
Step 4: Add a Layer of Green Materials
Now add a layer of green materials like kitchen scraps (vegetable peels, fruit scraps), grass clippings, and coffee grounds. This layer should be about 2-3 inches thick.
Green materials provide nitrogen, which is essential for the growth of the microbes that break down the compost. They add necessary moisture and help heat up the compost pile as they decompose.
Step 5: Repeat the Layering
Continue alternating layers of brown and green materials until the bin is full or your materials are used up. Aim to maintain a roughly 3:1 ratio of browns to greens by volume.
Try to end with a brown layer to help control odors and deter flies.
Step 6: Top Off with a Brown Layer
Finish the pile with a thicker layer of brown materials, around 4-6 inches deep. This acts as a cover to reduce any unpleasant smells and prevent attracting pests.
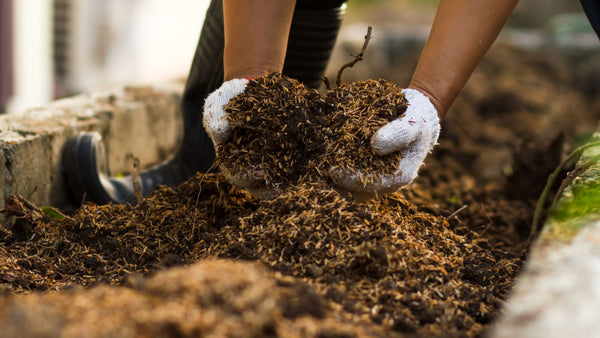
Keep an eye on the moisture level of your compost over time. It should feel like a wrung-out sponge. If it’s too dry, sprinkle water during dry periods. If it’s too wet, add more brown materials to absorb excess moisture.
Should Compost be Layered or Mixed?
Whether to layer or mix compost depends on the gardener's preference and the intended speed of decomposition. Layering is simpler and requires less maintenance, ideal for casual gardeners or those with limited time.
Mixing or turning the compost introduces more oxygen and speeds up the process, benefiting gardeners who want to compost more quickly. Layered compost, however, will also decompose, just at a slower rate.
Should You Turn Layered Compost?
Turning layered compost is not necessary, but it can be beneficial. If you prefer a quicker composting process, turning the pile periodically (every few weeks to months depending on size and materials) can introduce oxygen needed for aerobic decomposition, which speeds up the process and prevents the development of foul odors.
However, if the pile is properly balanced with browns and greens, turning might be less necessary. For a more hands-off approach, simply layer the materials and let nature take its course.
Conclusion
Layered composting is an effective method for recycling organic waste into valuable compost. By understanding the basics and implementing a structured approach, gardeners can create a thriving compost system that enhances soil health and boosts plant growth.

